A long long time ago (or what seems it), I did a lot of DIY around the house that we lived when we were in Rochester. Our house was pretty old. Like 1890s old. And the house needed a lot of love.
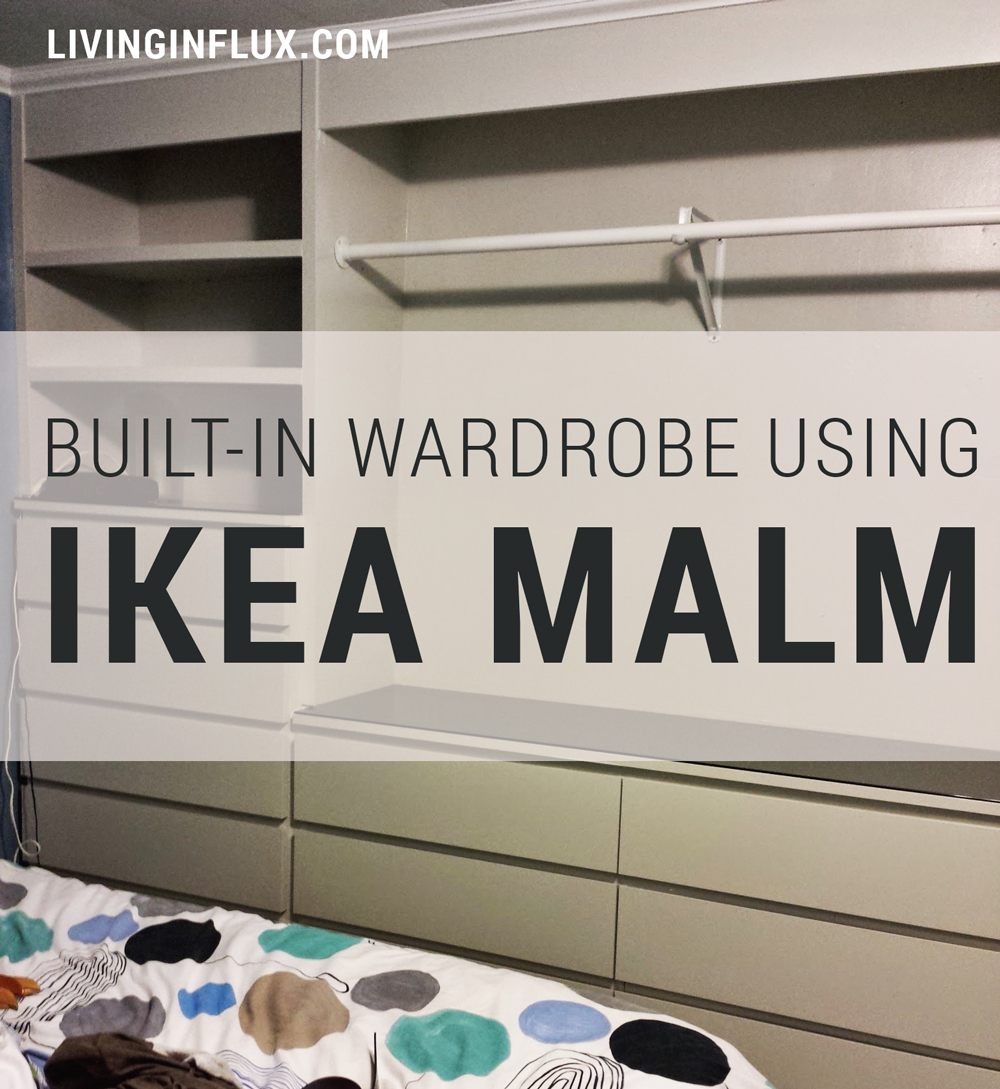
One of the main challenges that we faced once I moved in was storage space. The house, being as old as it was, had only one closet. One closet! And it was not in either of the bedrooms. Richard had been using a dresser and a wardrobe for his storage needs. When I moved in, we brought up another dresser from the basement for me to use. We were still pretty space challenged, so we decided to do something about it. We had a lot of ideas floating around, but ended up doing an IKEA hack to build a built-in wardrobe using Malm dressers.
Before: Tight quarters
Our bedroom was only about 8′ x 12′. With the bed and storage on both sides of the bed, we had about 6 inches of clearance for getting around the room.
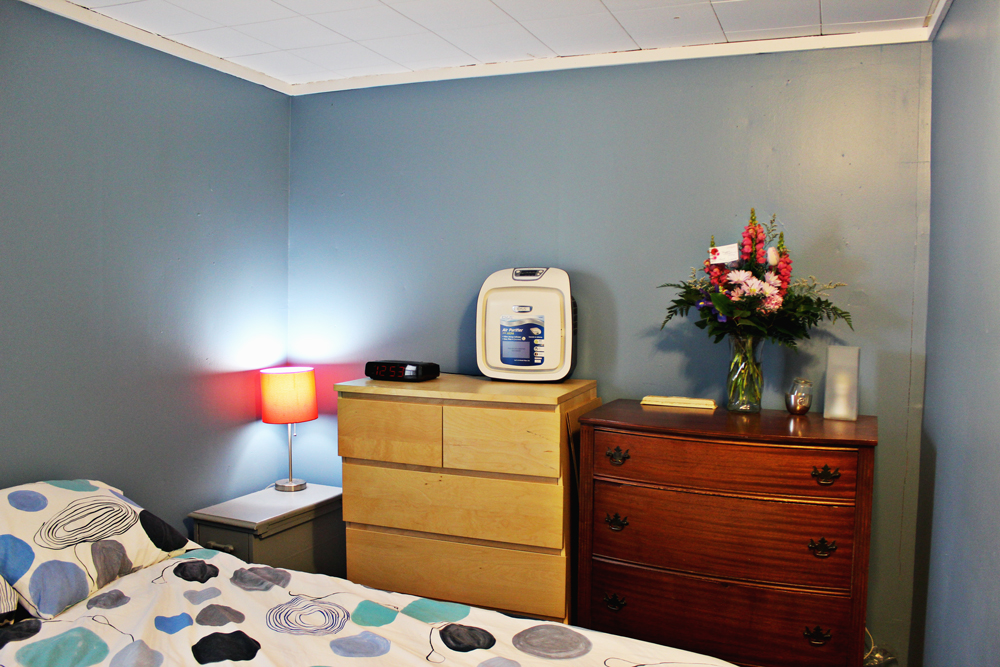
We wanted to figure out a way to try to consolidate all of our storage onto one side of the room so that we could free things up a bit. That’s when I schemed up the plan to build a built-in wardrobe on one side of the room.

Fast forward through a lot of brainstorming and planning and I successfully completed an IKEA hack and built a built-in wardrobe along one side of the bedroom. I don’t miss a lot of things about Rochester or the house we were living in, but this is the one thing that I get a little misty eyed over. We just didn’t have enough time with the fruits of our labor!
Materials I Used
You’ll likely have different room dimensions, so you may need to alter what you need. However, for your reference, here are the main materials I used:
- IKEA Malm 6-drawer chest
- IKEA Malm 6-drawer dresser
- Glass Top for Malm Dressers
- Lots of Paint (I used Behr Satin Interior)
- Behr All-in-one Primer & Sealer (or your favorite bonding primer)
- 2 x 6 boards for the base
- Plywood or MDF (More on this later)
- Caulk
- Lattice strips for trim
- Closet rod and hardware
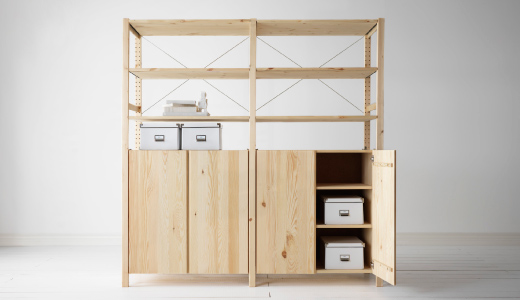
One thing to note about the IKEA dressers: I had contemplated approaching this built-in from a number of angles. Should I try to build my own drawers? Can I find something off of Craigslist to get the job done? Is there some sort of pre-made thing that I can buy? I went with Malm because this IKEA hack gave me the best of both worlds – I was able to tailor it to exactly what I needed, but I didn’t need to build anything from scratch.
A number of tools were pretty pivotal to the success of this project:
- Air compressor
- Nail gun
- Miter saw (I used my Hitachi Compound Miter Saw
)
- Ear protection (I used these earmuffs
)
- Level
Putting it Together
I completed this project over the course of three months. That was because I hit a couple of snags and I was working on it intermittently. If everything goes well, you could have this done over the course of one or two weekends (since there is a lot of down time due to painting and caulking and whatnot).
1. Remove the “crown moulding”
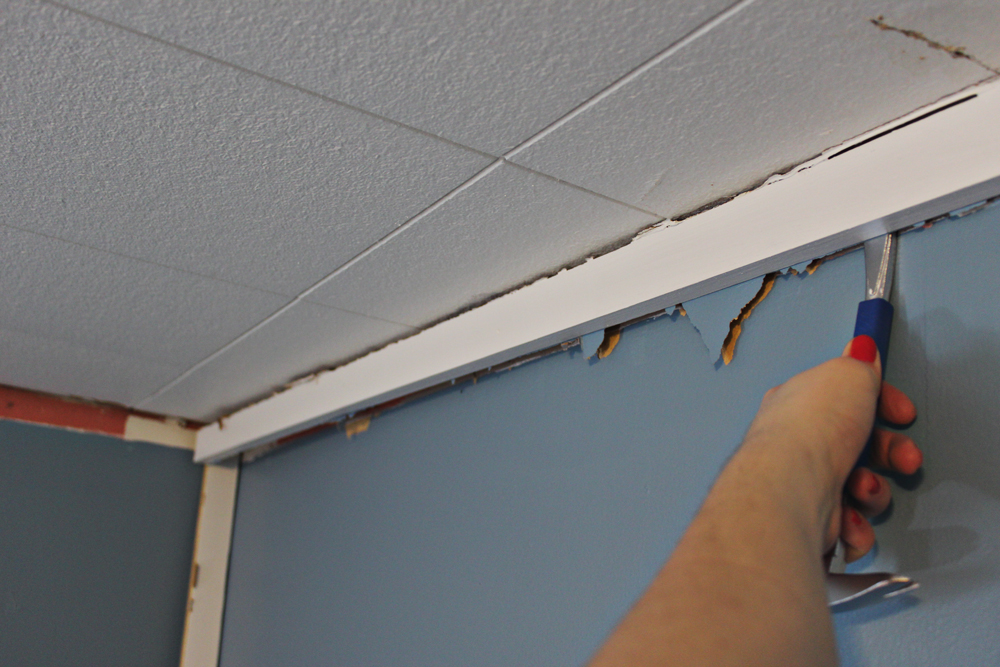
Whoever put up the “crown moulding” in the bedroom was kind of a dummy. It was basically just a 1×2 nailed to the ceiling. It didn’t look good and I knew I would need to remove it to put up the wardrobe. So off it went! As part of this project, I added new crown moulding in the bedroom, but I didn’t really document that process.
2. Paint the wall
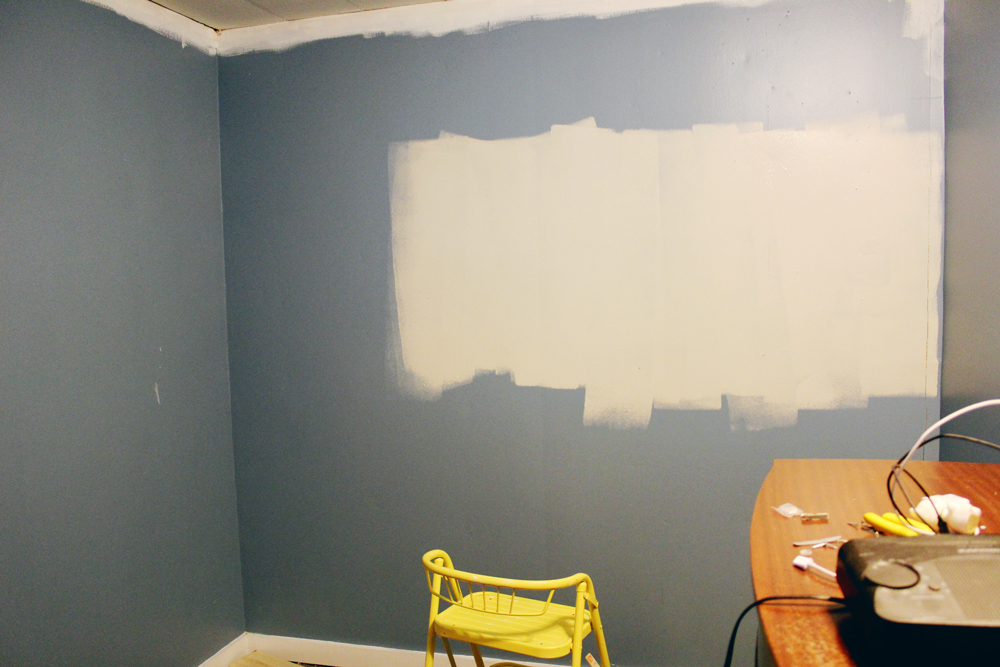
The built-in wardrobe had an open back. I didn’t put any sort of material on the wall (like a bookcase would have). Since I was going to have the built-in be gray, I started by painting the wall gray. I figured this would be easier that trying to navigate a small space with more corners after the built-in was assembled.
3. Lay the base
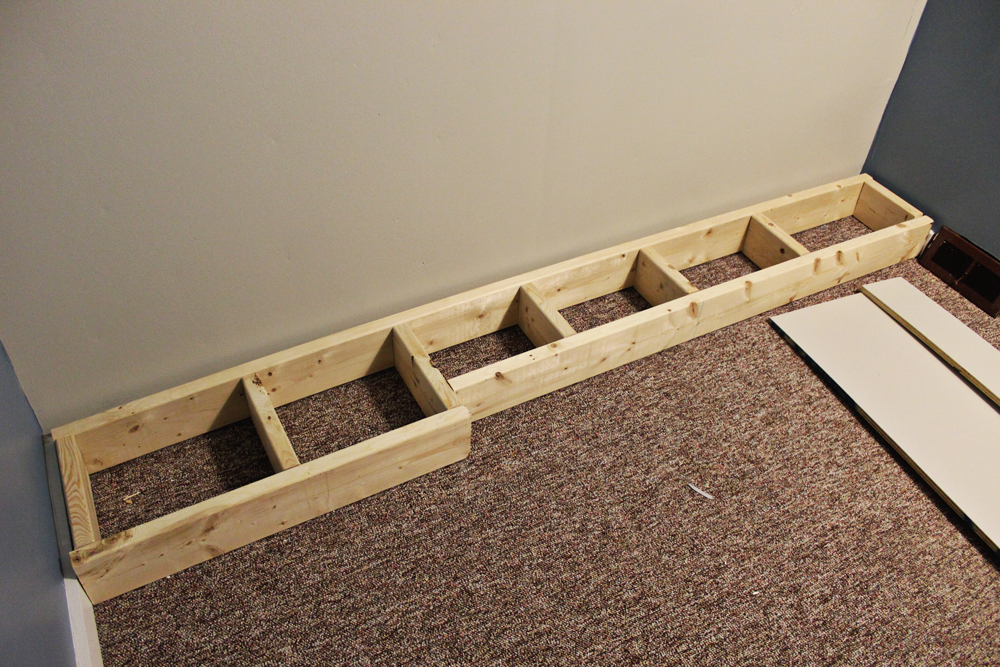
Once I had the wall painted, I was ready to start laying the base of the built-in. I created the base from a number of 2×6 boards. One of the challenges that I faced in building the built-in was the placement of our heat register. The base helped elevate the dressers and left room for the air to still flow out.
4. Paint all of the pieces
As I was working on building the base, I was also busy cutting and painting all of the pieces that I would be using to assemble the built-in. Painting ahead of time makes it much easier, because flat surfaces are much more pleasant and easy to paint when compared to surfaces that have a lot of corners and such.
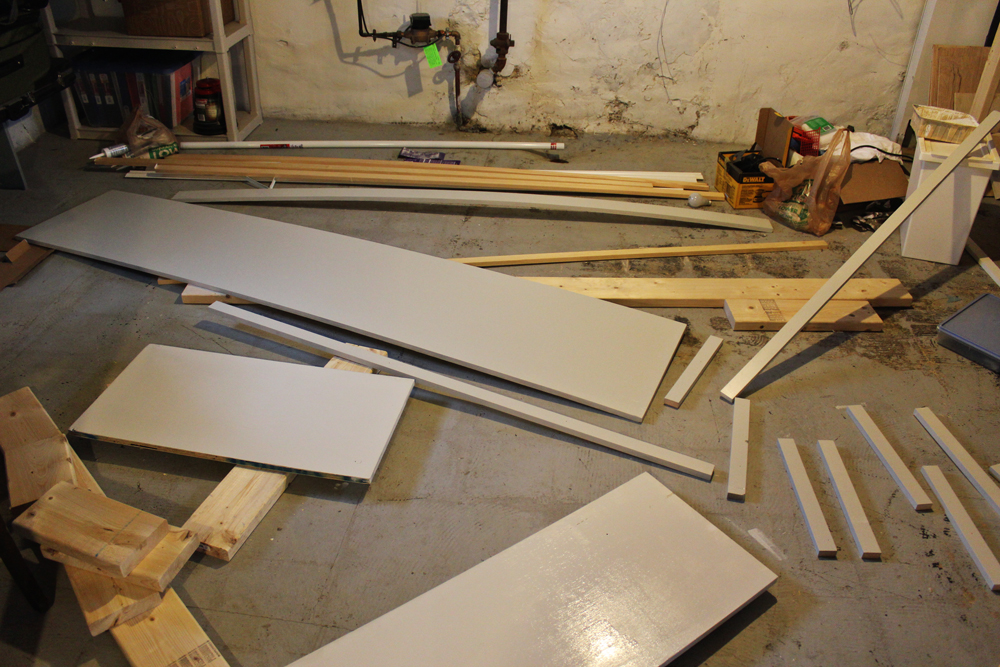
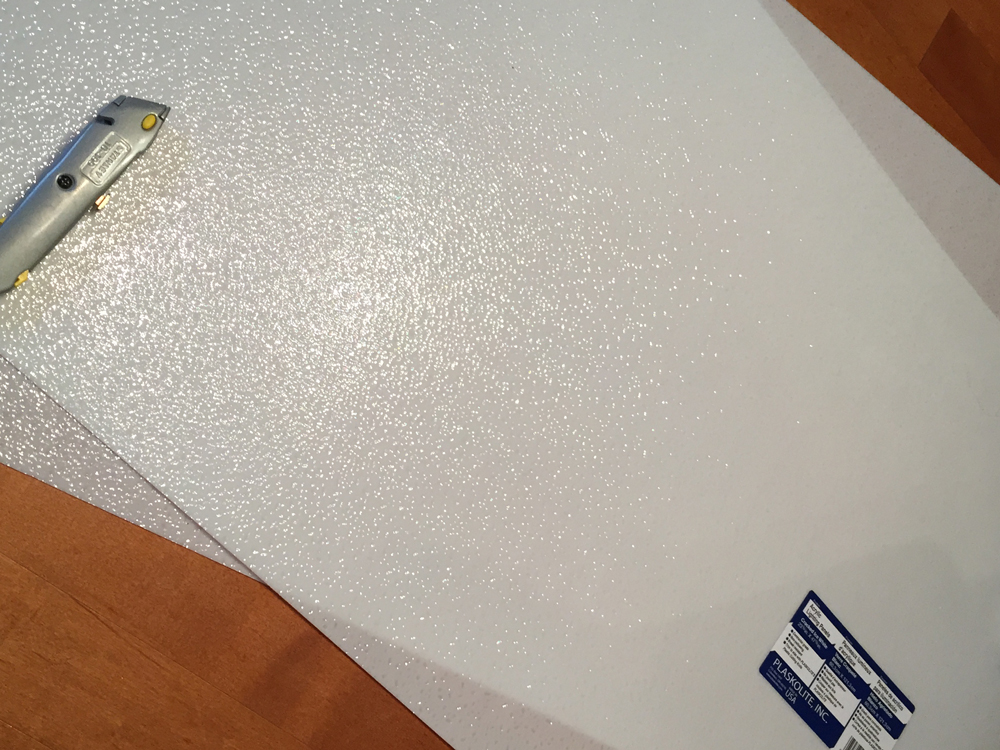
5. Figure out that I chose poorly
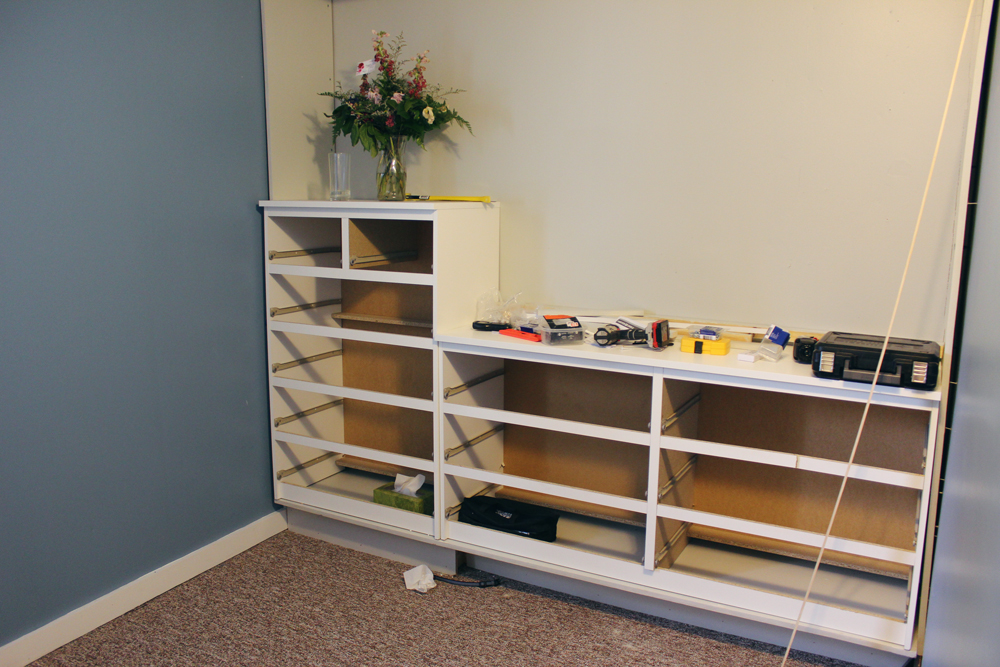
Like any good DIY project, I experienced a number of bumps in the road. I assembled the dressers, had the base ready to go and then realized that the plywood that I purchased was going to be a showstopper. I had tried to pick a plywood that was flat, but ended up with a piece that was faaarrr too warped and curved. As you can see, there were huge gaps between the wall and the plywood. The gaps were so big that I wasn’t able to put plywood between the two dressers as I had planned.
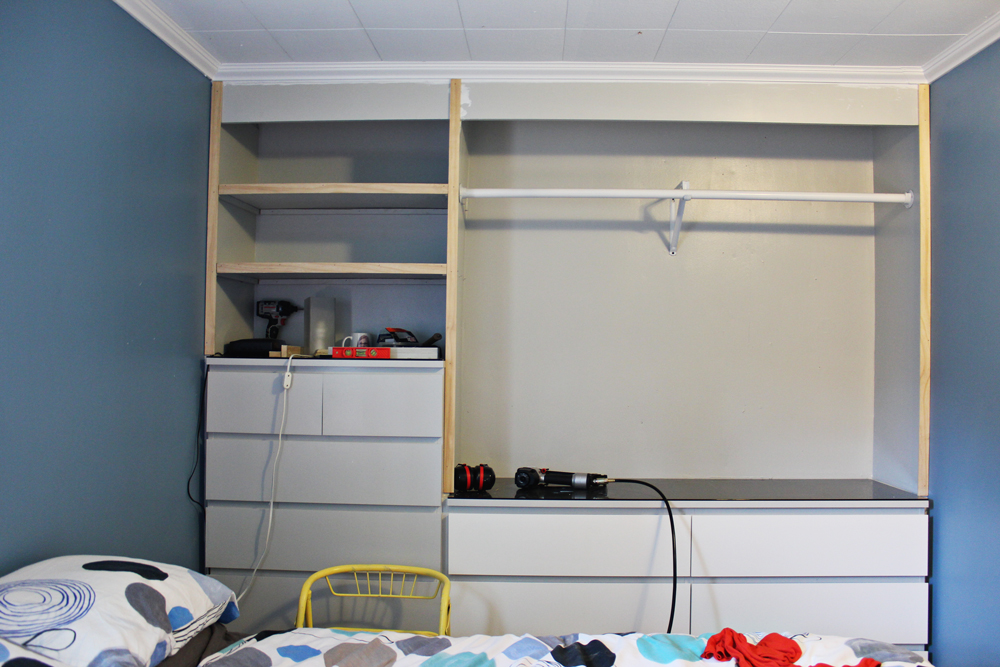
6. MDF to the rescue!

I ended up deciding to scrap the plywood that I had purchased and purchased MDF instead. With MDF, I knew it was going to be straight. If I could do it again, I probably would just start with MDF. With the MDF, I had room for the piece between the two dressers. I also attached a piece at the top to add some stability to the three vertical pieces.
7. Painting and touching up

I ended up using a lot of caulk to smooth out the various cracks and crevices. I also painted the dressers, since they were white and I wanted the built in to be gray like the wall. Since the dressers were laminate, I used a base coat of Behr’s All-in-one Primer & Sealer. I didn’t like it as much as Zinnser’s bonding primer, but it did the trick and it is not oil-based so I didn’t have to deal with the fumes in the bedroom.
8. Ready for use but not done
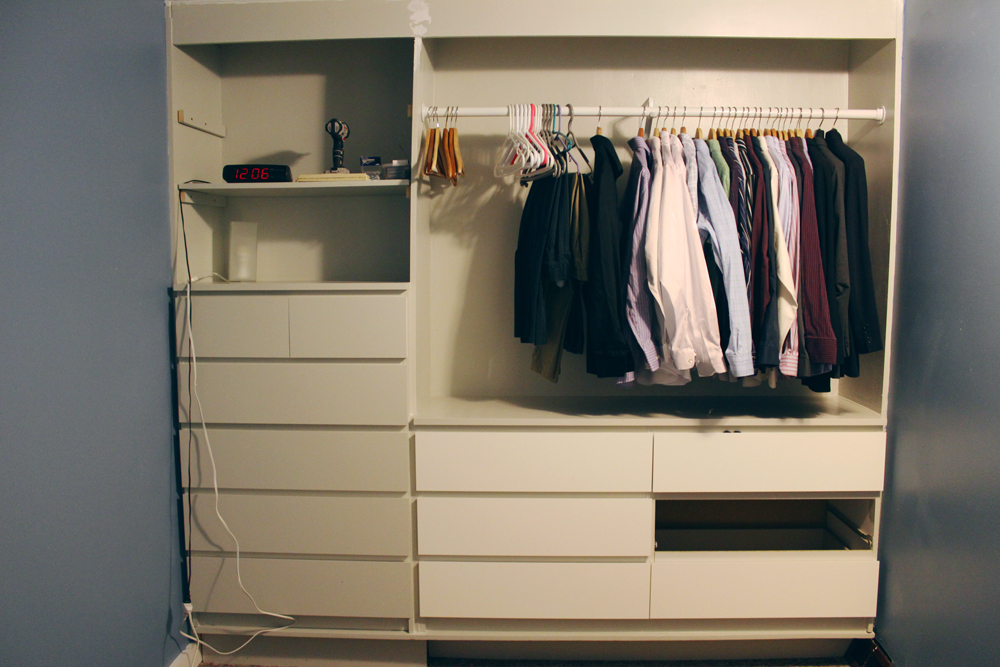
This project took a long time to complete. Partly due to the setback with the plywood, partly due to my laziness. I eventually got to a good enough point and took a break for a couple of weeks. At this stage, we could store our clothes, but the built-in didn’t look as good as I knew it could.
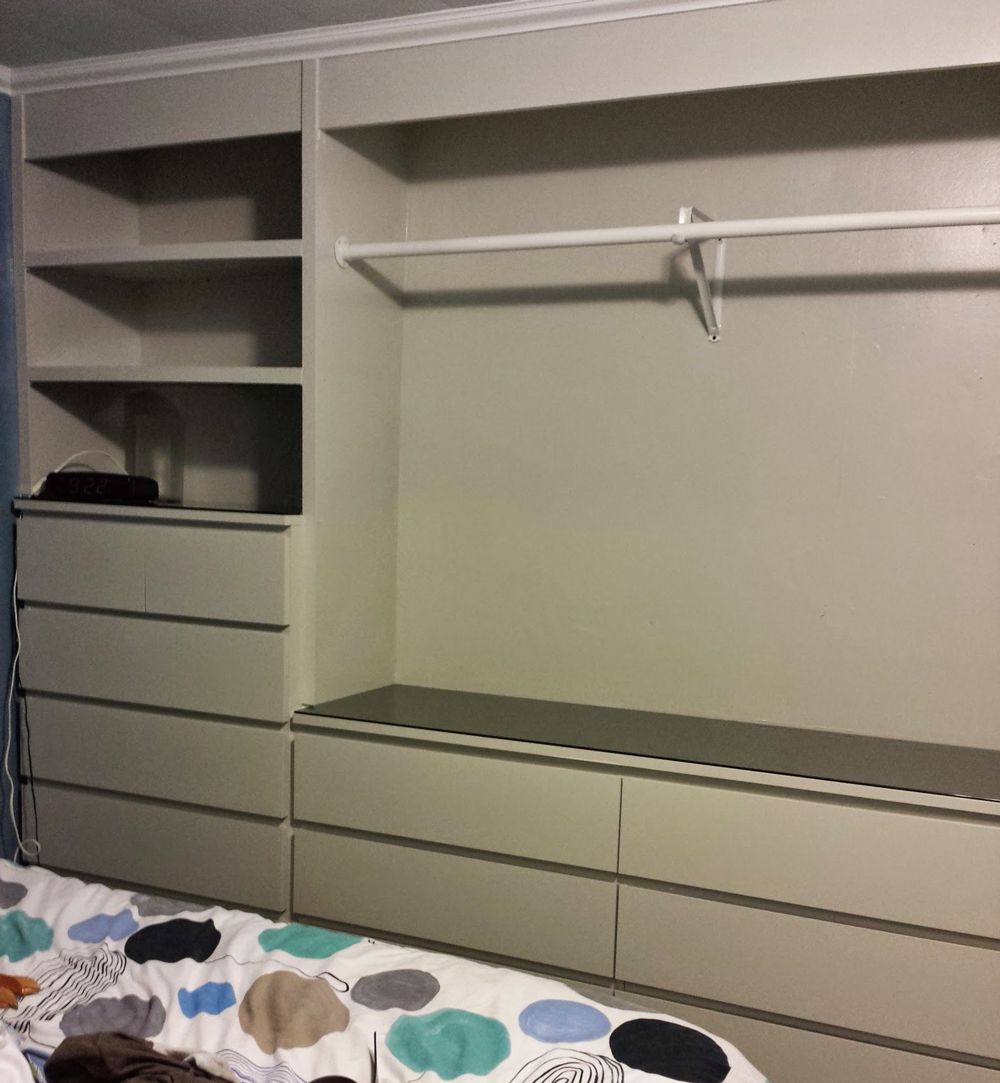
9. Trim it up
When I finally got around to finishing up the project, I added trim around the shelves and the sides of the built-in. This made it look so much more cohesive and finished. I also eventually got around to painting the faces of the long dresser. You’ll also note that I added the crown moulding around the bedroom.
10. Touch up the trim

I can’t stress this enough: caulk makes a huuuuuge difference for these types of projects. It seals everything up. You just need to make sure you’re good at caulking, because it’s easy to have the caulk dry up too quickly and you don’t get as smooth of a look as you would have hoped. My trick was to use a wet rag and run it over the freshly applied caulk every few inches or so.
11. Paint it all up
The last step is painting everything. And obviously let it dry for a while. And you’re done!

The Skinny on the IKEA Hack built-in wardrobe
It’s been a while, so I’ll do my best to give you the skinny on this project.
Cost

Since it’s been so long since I did this project, I don’t have exact numbers on how much this project cost. Since it’s likely that you’ll be having to customize it to your particular needs, I’m not sure how helpful this would be. However, I can still give you some high level details/estimates for materials:
- MALM 6-drawer chest – $170
- MALM 6-drawer dresser – $150
- Glass top for MALM chest – $20
- Glass top for MALM dresser – $30
- Lots of Paint (I used Behr Satin Interior) – ~$30 (I used a lot of leftovers, but purchased some extra so this is an estimated cost)
- Behr All-in-one Primer & Sealer – $10
- 2 x 6 boards for the base – ~$20
- Plywood – 3 sheets – ~$90
- MDF – 1 sheet – ~$30
- Caulk – $12
- Lattice strips for trim – around $20
- Closet rod – $20
- Closet pole sockets – $5
- Heavy duty closet rod support – $4
The only tool that I needed to purchase for this project was an air compressor. I purchased the Porter Cable 3-Tool Combo Kit which included the compressor, a nail gun, a brad gun, and a staple gun. This was useful for a number of projects around the house including an upholstery project and installing board and batten and moulding throughout the house. I can’t remember how much I paid for it unfortunately, although I think it was around $200.
All said and done, I spent around $611 on materials and supplies (excluding tools). Of course, this is an estimate so your mileage may vary. One thing that is a bummer is that we couldn’t take this with us when we moved! We had to buy new dressers instead. I like to think that this expense helped contribute to the quick sale and selling price of the house though, so I don’t see it as a complete wash.
If you are looking to cut costs from what I did, you could try to find the dressers on Craigslist. I like Malm because they are boxy, look modern, and can blend in with a lot of things.
Time
I’m not really sure how to accurately estimate time for this project. Let’s just say it took a lot of work! I started in February and didn’t really wrap up the finishing details until April. Over the course of those months, I probably spend anywhere between 60 and 100 hours. I really don’t know! Just assume that it will take a while.
Skill

This wasn’t the most technical project in the world, but it did require a lot of planning and thought. It also required the use of multiple power tools that require a bit of skill and safety precautions. For that reason, I rate this as a 3 of 4 skill level.
What do you think of this IKEA hack? Have you ever done anything similar?
Disclaimer: This post contains affiliate links. If you click on them, I receive a small commission for referring you. As always, all of my opinions are my own!


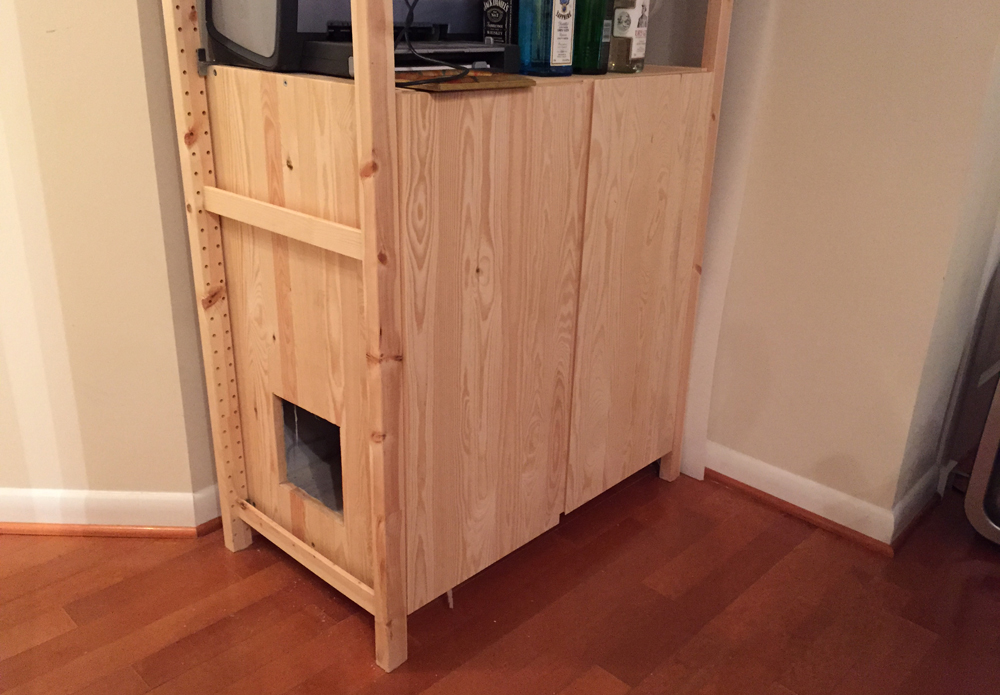
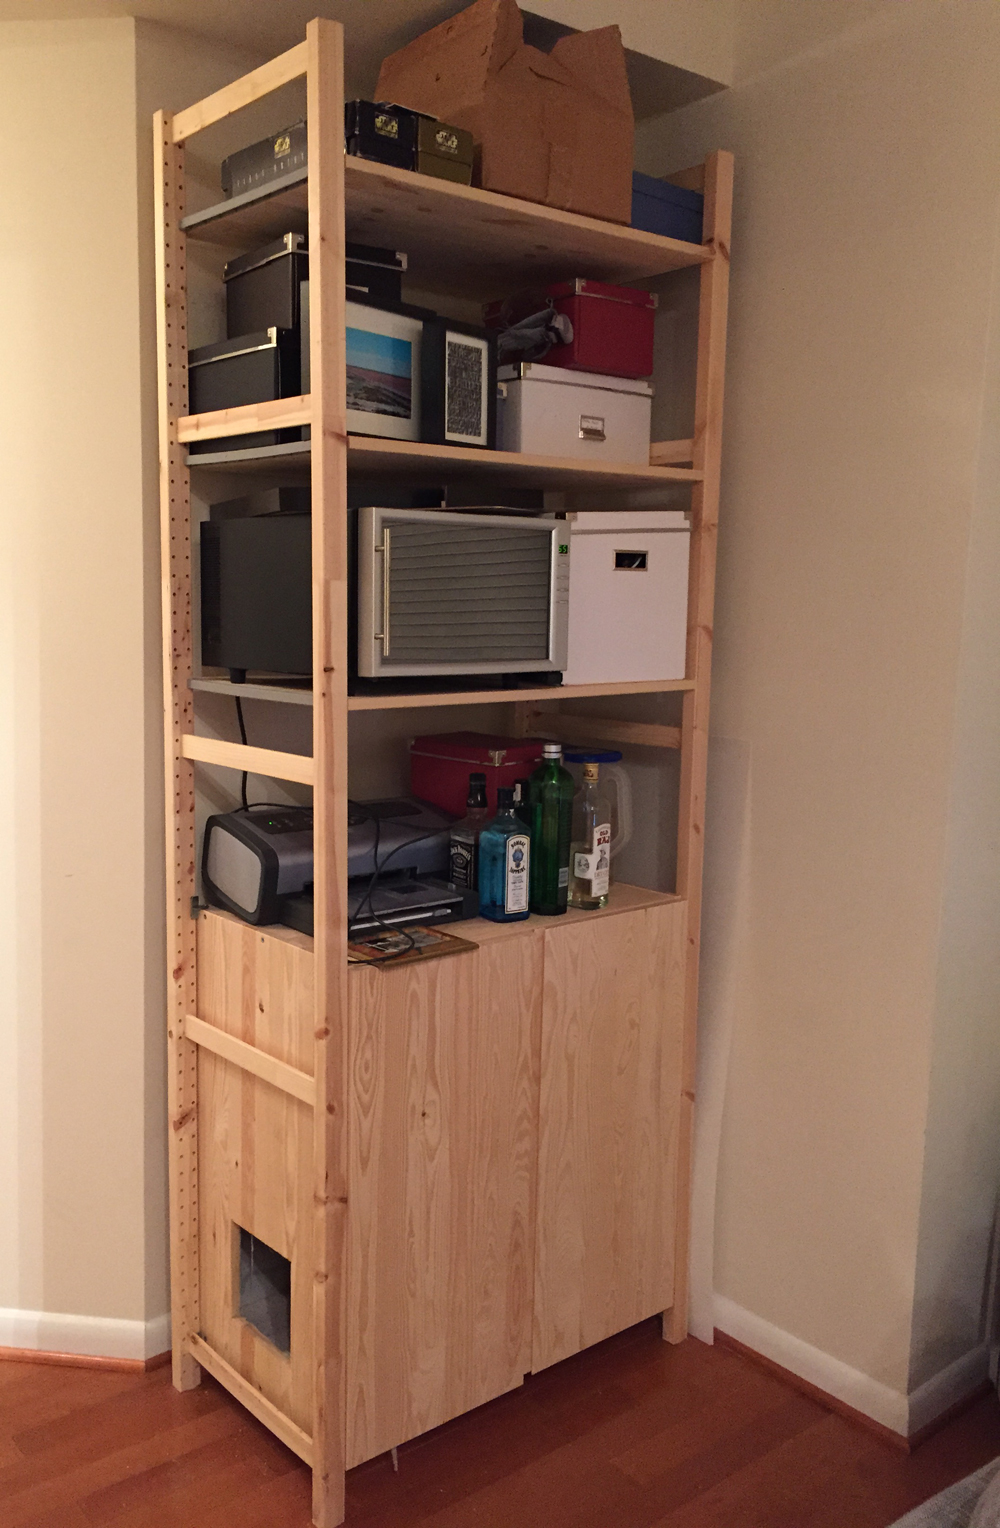
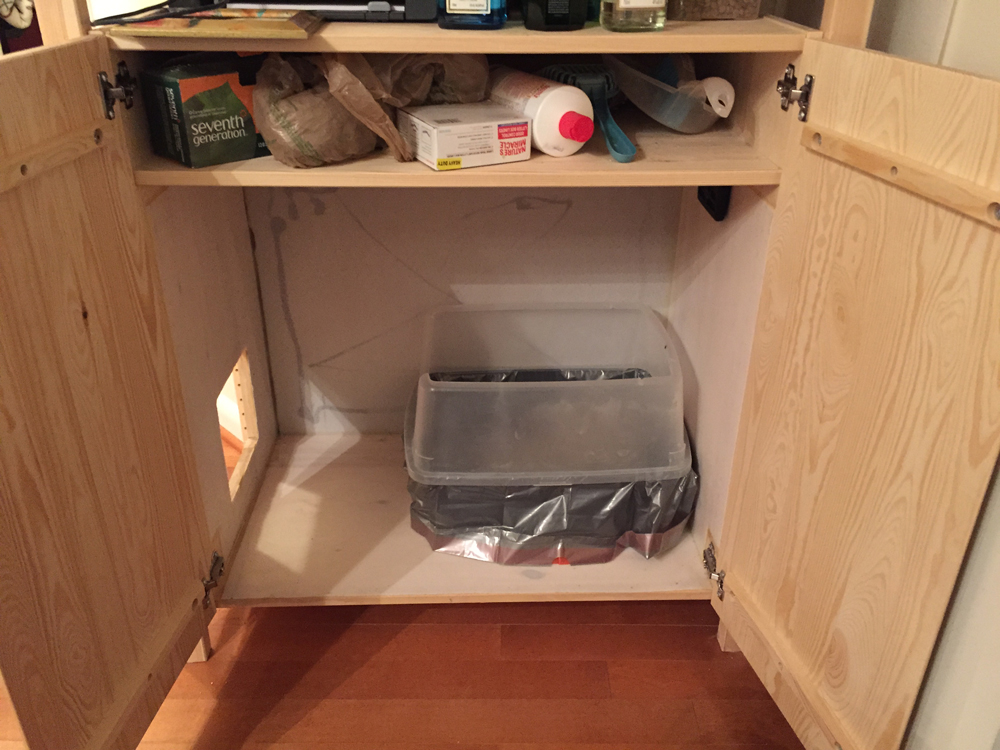 Once I had the cabinet assembled, I placed the litter box inside of the storage unit. I left the doors to the cabinet open for a week or two so that Zeke could enter through the cat door or through the front of the open cabinets. During this time, it became clear that Zeke was having some trouble aiming into his litter box. It seems that the enclosed space made him feel like he didn’t need to be as careful. To help combat more accidents, I decided to get a high-sided litter box. Luckily, this did the trick and we haven’t had any issues since!